Woodland Dream Tsuba

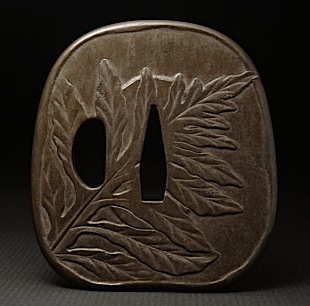
                                                                                             collection of Kiyomizu Sannenzaka Museum

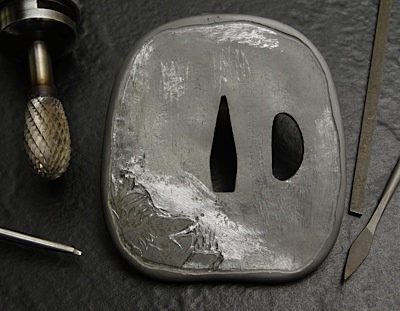
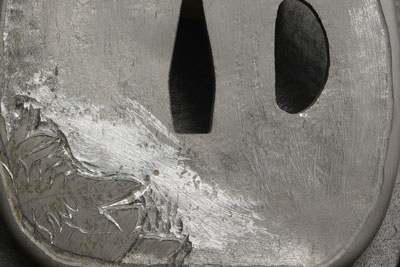
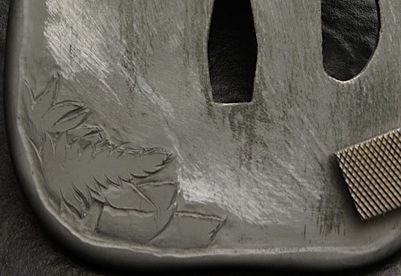
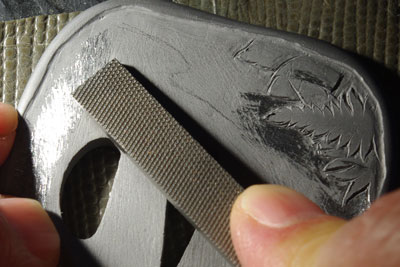
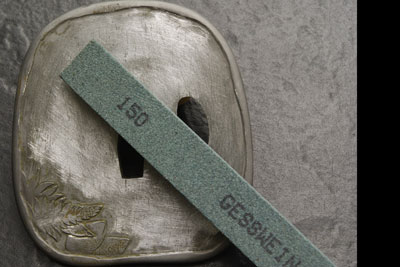
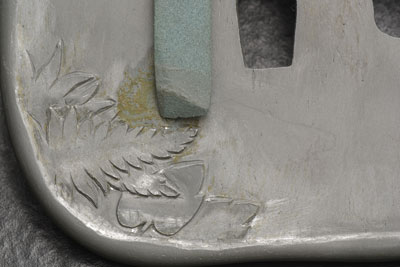
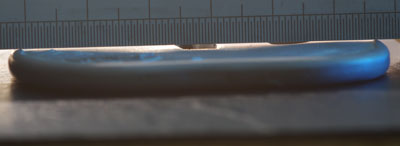
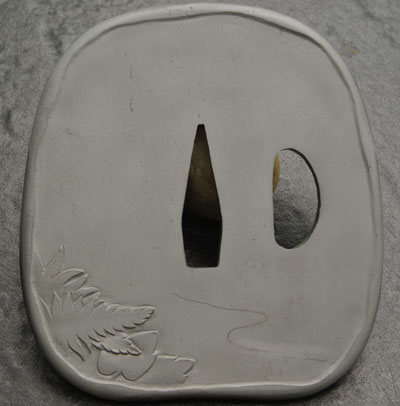
I struggled with what to focus on in this tutorial and in the end decided to concentrate on the use of files and stones in leveling the background of this tsuba. I felt this would be useful no matter what the extent or type of  engraved detail. A simple contour can actually be fairly difficult to achieve, but a few tips can make it much less difficult and more enjoyable.

For me flat files and stones are indispensible in achieving a flat or gently sloping contour.  To check progress I use heavy side-light which reveals the slightest surface variation. Also, I find a light sand-blast with 400g aluminum oxide very effective in evening the light, thus revealing all imperfections.

I have been using Gesswein stones which I recommend. I haven't tried other brands. I find their regular Moldmakers' stones to work well in iron and non-ferrous. I also use their Ultrasoft stones in finer grits for polishing carved elements, but find that it's risky to use them on flat surfaces as they tend to gall. If I'm polishing a flat surface to a high polish, I'll use stones to about 600 and then use paper from there on. I recommend getting a hard-copy of the Gesswein Mold and Diemakers' catalogue as it is easier to survey than online.


From the carved mimi(rim) I wanted to make a gently sloping curve down to the seppa-dai (flat area around the tang hole, or nakago-ana). I used the drill-press to establish this flat area with a series of controlled depth (about 1.5mm) drillings within the seppa-dai area.


Initially I removed the bulk of material with a large rotary burr after the engraved area was blocked out with an onglette graver.

The depth of the engraved cut that defines the mimi (rim)

is about one-half mm. This means that the background slopes down to the flat seppa-dai about one mm.


The background around the engraved area was first chiseled away, then flatened with files. In this photo chisel marks can be seen just next to the engraved design.

Also, one round depth drill hole can be seen that I kept as a guide until the very end of this process.


As can be seen, I use a pretty coarse pillar file for the major surface leveling/blending, being quite careful near the carving and mimi. I use a riffler and smaller pillar files in and around the carving, as well as chiseling and scraping.


Heavy side-light reveals variations in the surface.


When I feel that the surface is filed to a nice contour, I begin to refine the finish with stones, beginning with 150 grit and moving through finer grits to 600 on this piece.

These stones work fine using water as a slurry medium.


Progressing with finer stones around the carving. The carved surfaces were refined using stones, scrapers and rotary abrasives.


End-view with light behind showing raised mimi and curve down to the seppa-dai.


Final background shaping, still to be textured. Engraving and mimi need more refinement.

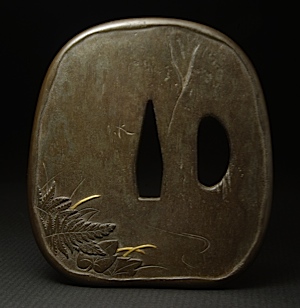
Final finish before patina.  61 mm wide